Access Management
Row Level Access Control
Row-Level Access Control (RLAC), often referred to as Row-Level Security (RLS), is a data security feature that allows for granular control over data access within the platform. Instead of simply granting or denying access to an entire table or column, RLAC enables administrators to define policies that restrict which specific rows of data a user or group can view or manipulate. The security logic is applied directly at the data source, meaning that no matter how the data is accessed (e.g., through a dashboard, report, or direct query), the row-level filters are enforced automatically.

Set Up Row-Level Authorization
The setup process involves two key steps:- Configure an index table: Think of this as your master permission list.
- Email column: Select the column that contains the email addresses of your users. This is used to identify who is currently logged in.
- Internal ID column: Select the column that will act as the “key” to unlock data (e.g., a
UserID,GroupID, orRegionID).
- Configure a filtered table: This is the actual data you want to restrict.
- Index Table: Choose the master permission list (index table) you just configured.
- Internal ID column: Select the column in this table whose values will be matched against the “key” from your index table. This ensures users only see rows that correspond to their ID.
Configure an Index Table
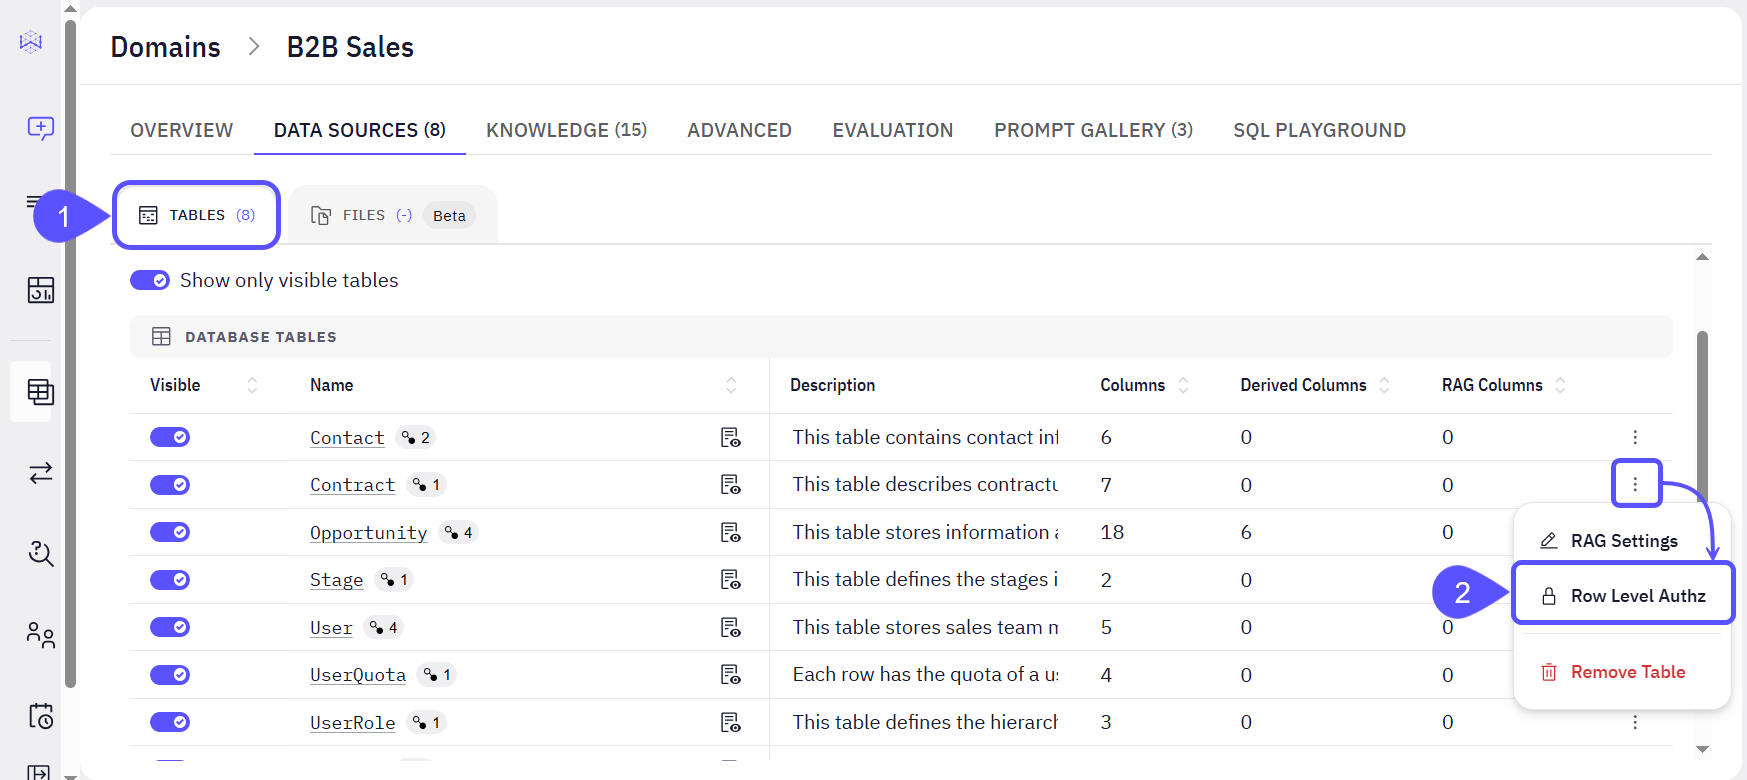
First, designate a table to act as the master list that maps your users to the data they are allowed to see; i.e.: configure the Index Table.- Within the selected Domain, Navigate to the Data Sources tab > Tables.
-
On the row you want to manage access control, click the three-dot menu next to the desired table, and select Row Level Authz.
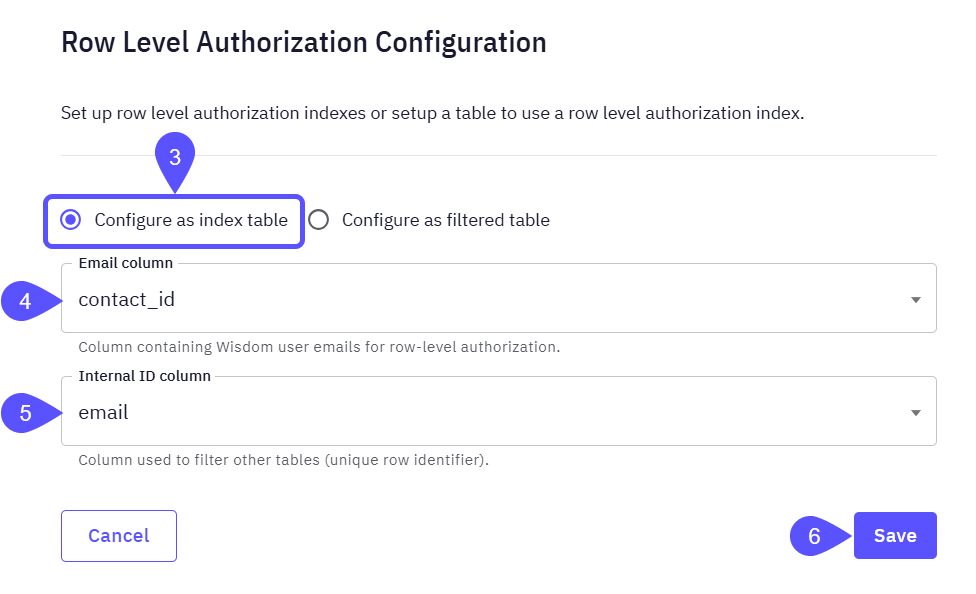
- In the modal that opens, choose the Configure as index table option to create the master permission list.
- Set the Email column to the column that contains user emails for row-level authorization.
- Set the Internal ID column to the column with the unique identifier used to filter other tables.
-
Click on Save to keep your changes.
Configure a Filtered Table
Next, apply this configuration by selecting the created Index table and the internal column that these users will have access to; i.e.: set up the Filtered table.- For the data table you want to restrict, open its Row Level Authz settings (as shown in steps 1 and 2 before).
- In the modal window that opens, choose the configure as a filtered table option.
- From the dropdown menu, select the Index Table you have previously configured.
- Select the Internal Column that will join with the Index Table’s Internal Column.
- Click on Save to keep your changes.
Key Considerations
- Data Admins bypass all restrictions and can view all data, while Explorers will always see filtered views.
- The system works best when user emails in your data match Wisdom user emails, though it can handle some variations.
- For filtering to work, the index table and filtered tables must be joinable on their respective ID columns.
- The table embedded RAG solution is not currently filtered by RLA, meaning all users may see all indexed results.