Learning Objectives
By the end of this tutorial, you will be able to:- Connect to your Database.
- Start experimenting with your WisdomAI chatbot to test it.
- Provide feedback so the system can create context by itself.
Before you Begin
To follow this tutorial, you should:- Have Admin access to your WisdomAI account.
- Know the credentials to access your data source.
Connect to Data Sources
To get started, you first need to connect your existing data source to WisdomAI so the system can access and prepare your data for use and create reports:-
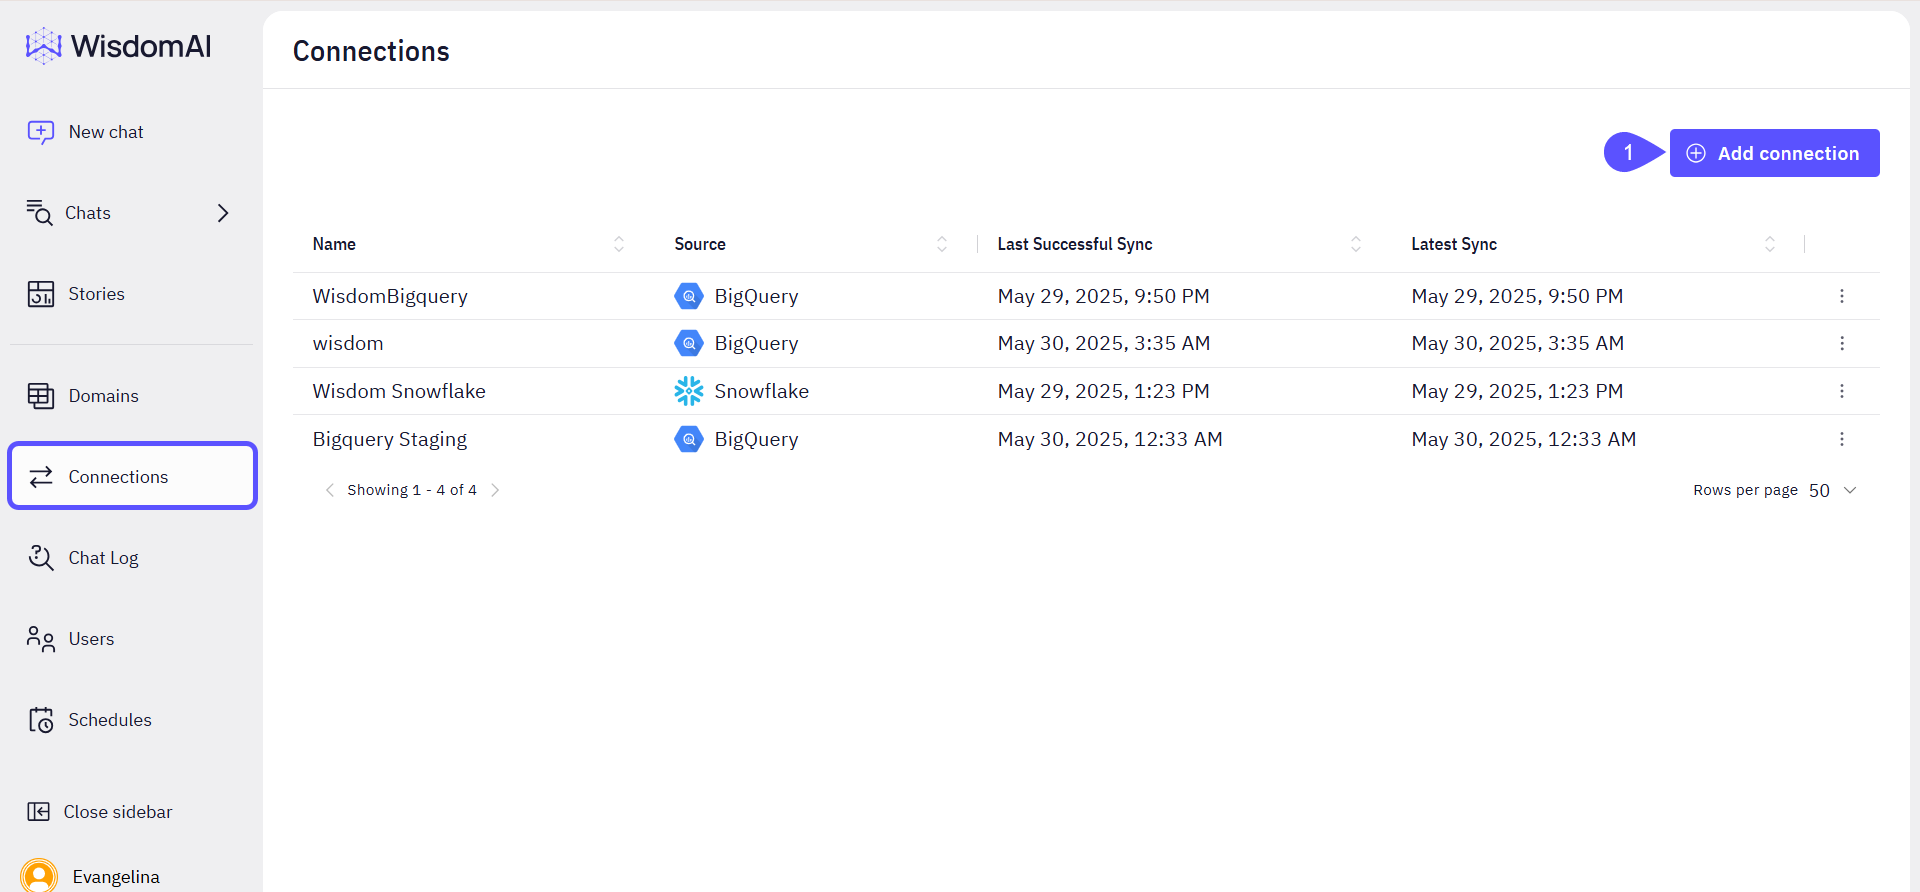
Go to the left sidebar, click on Connections, and click on the Add Connection button to start.
This action lets you link your existing data sources to WisdomAI. Doing so enables the system to scan metadata. For data warehouse connections, it also allows WisdomAI to fetch data when users ask questions in natural language.
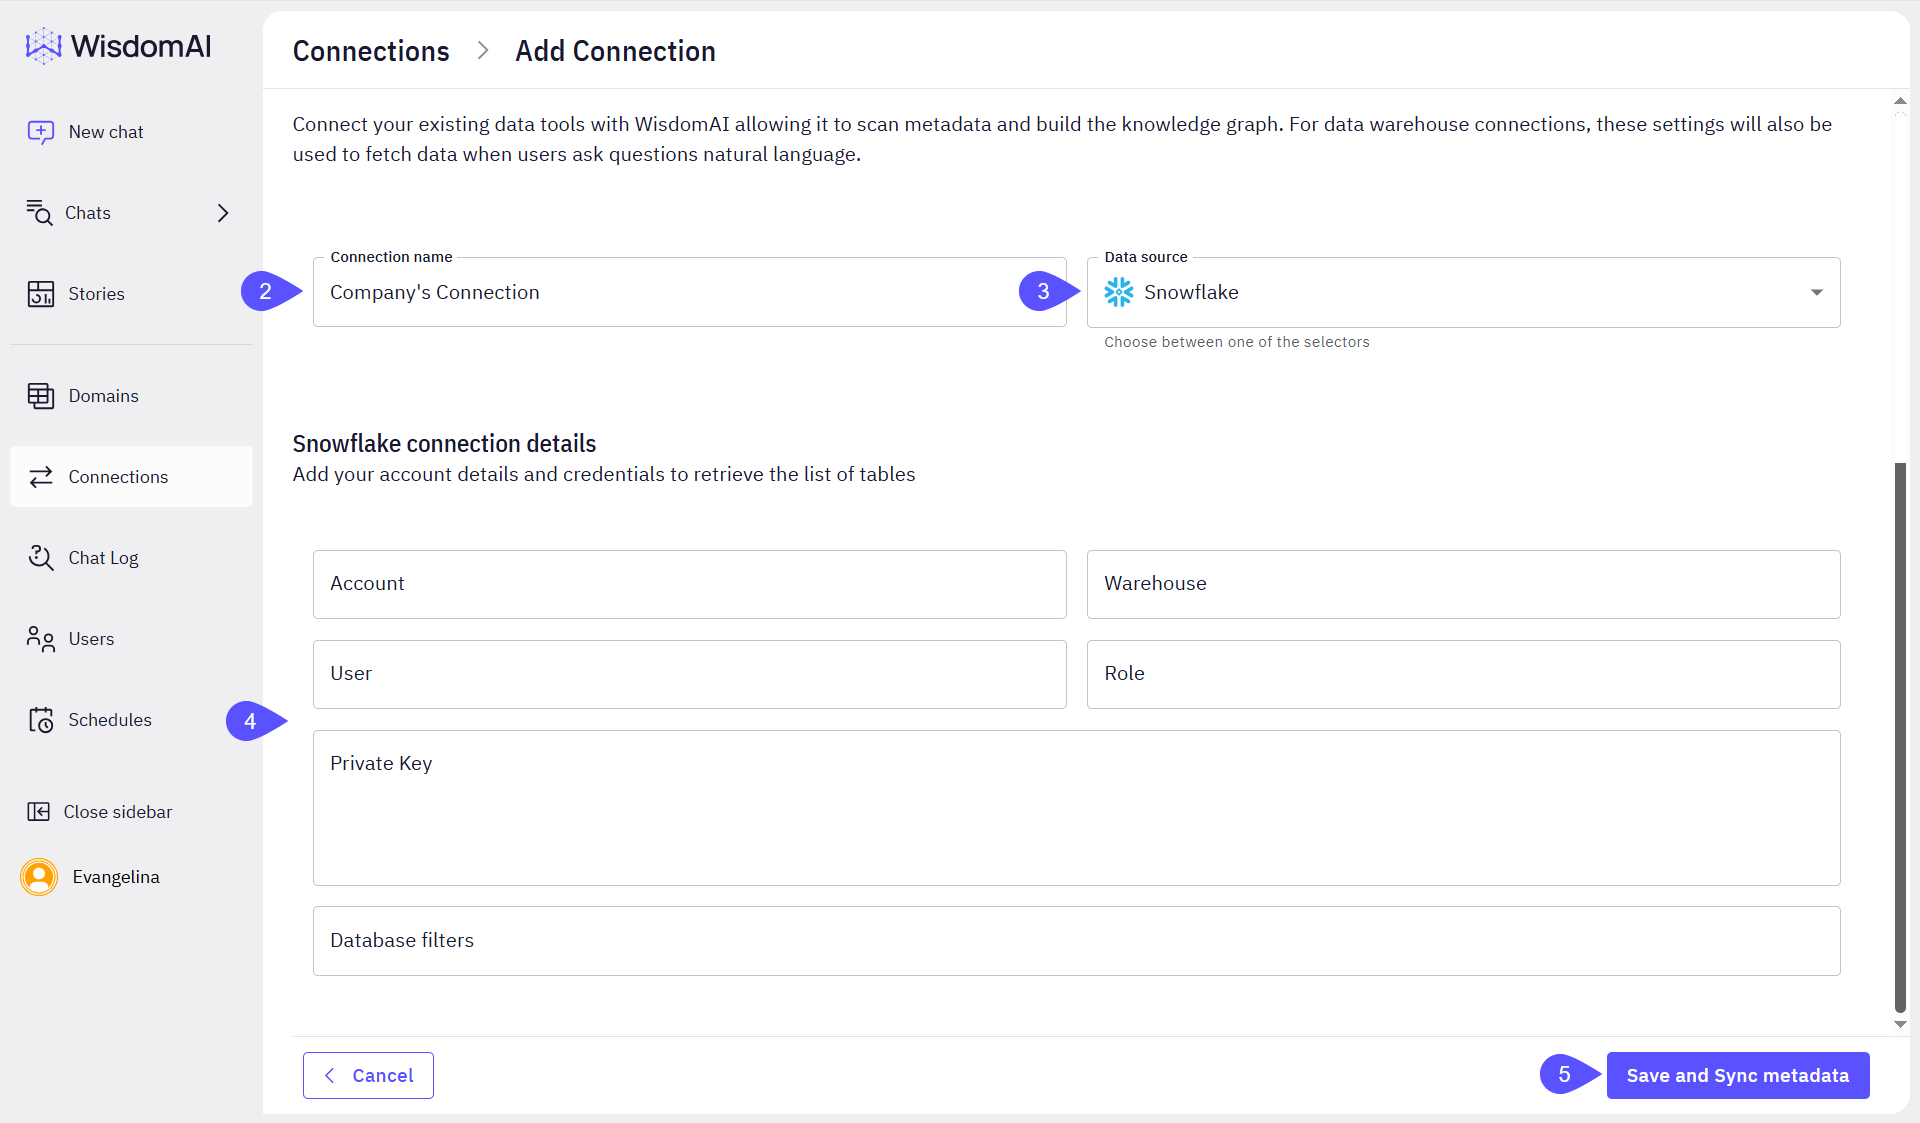
- Add a Connection name. Make it representative so it is easy to identify among other connections.
-
Select the Data Source type.
Access Supported Data Sources to see the complete list of supported data sources by WisdomAI.
-
Once selected, add your data source credentials, including:
- Account
- Warehouse
- User
- Role
- Private Key
- Database Filters
- After you have added your credentials, click on the Save and Sync metadata button.
Select the Data
After you have added your data source, you will need to select what data you want to use in your project. For this, you will need to create a Domain.-
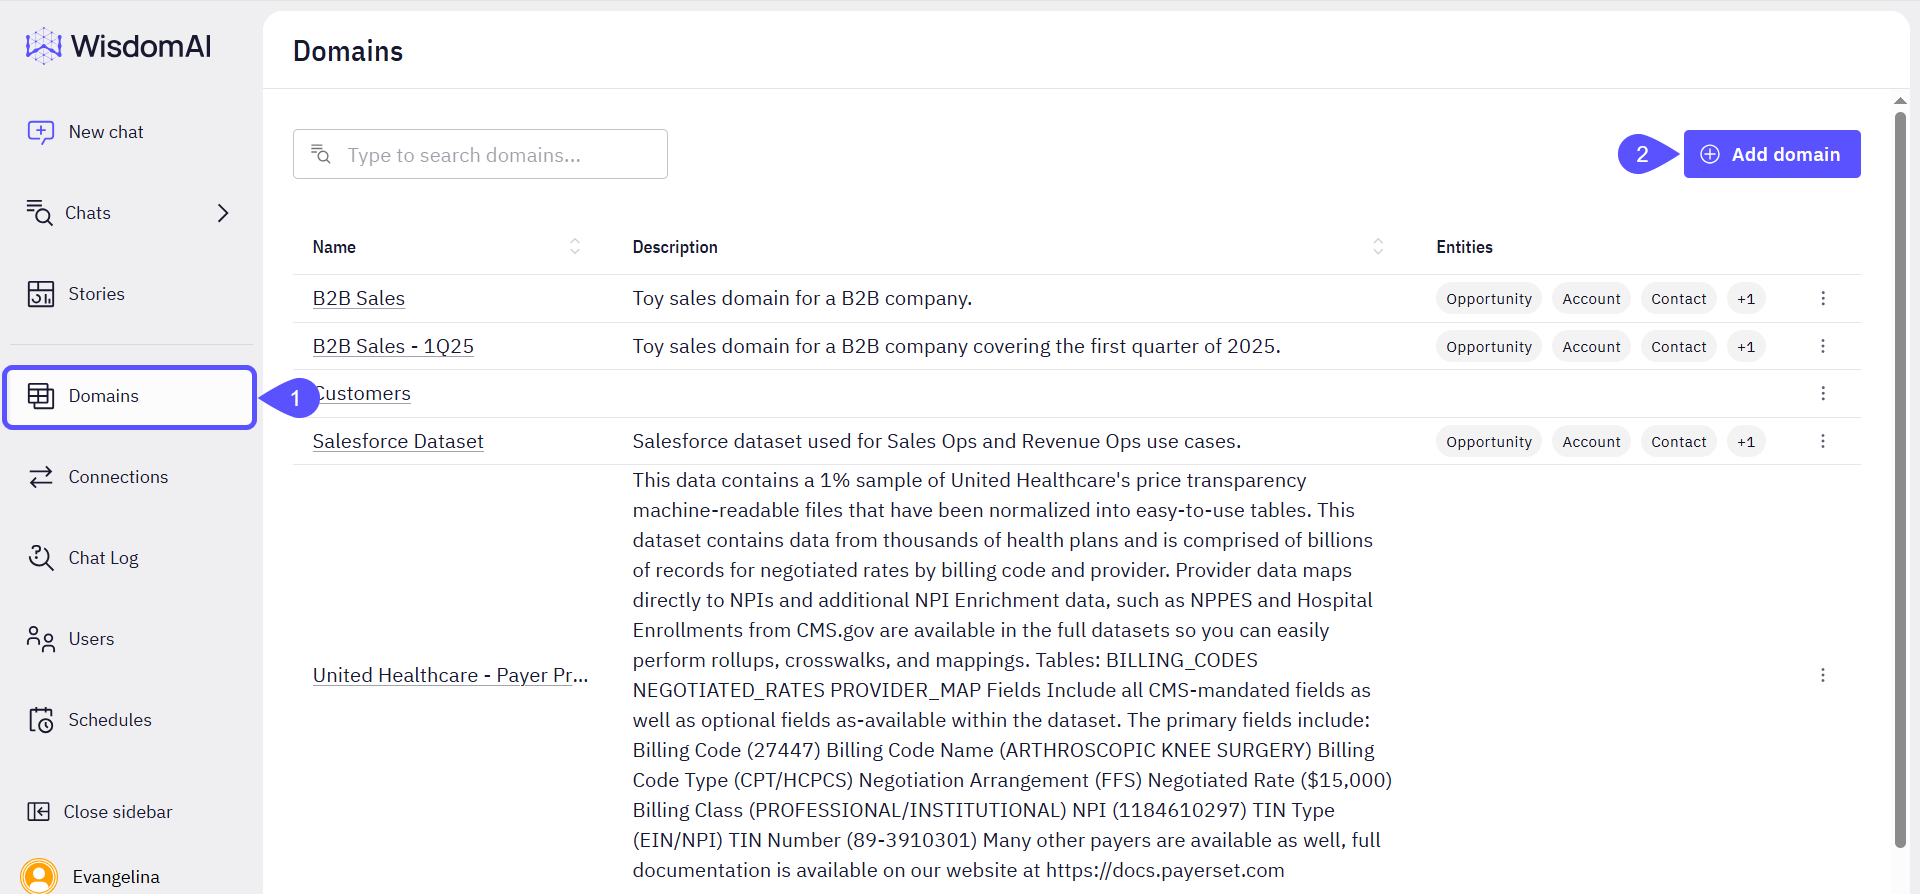
Go to Domains in the left sidebar.
A Domain represents a logical business area or function, such as Sales, Marketing, or Finance. Creating well-defined domains makes data more accessible and relevant to business users.
- Click on the Add Domain button. A new window will open.
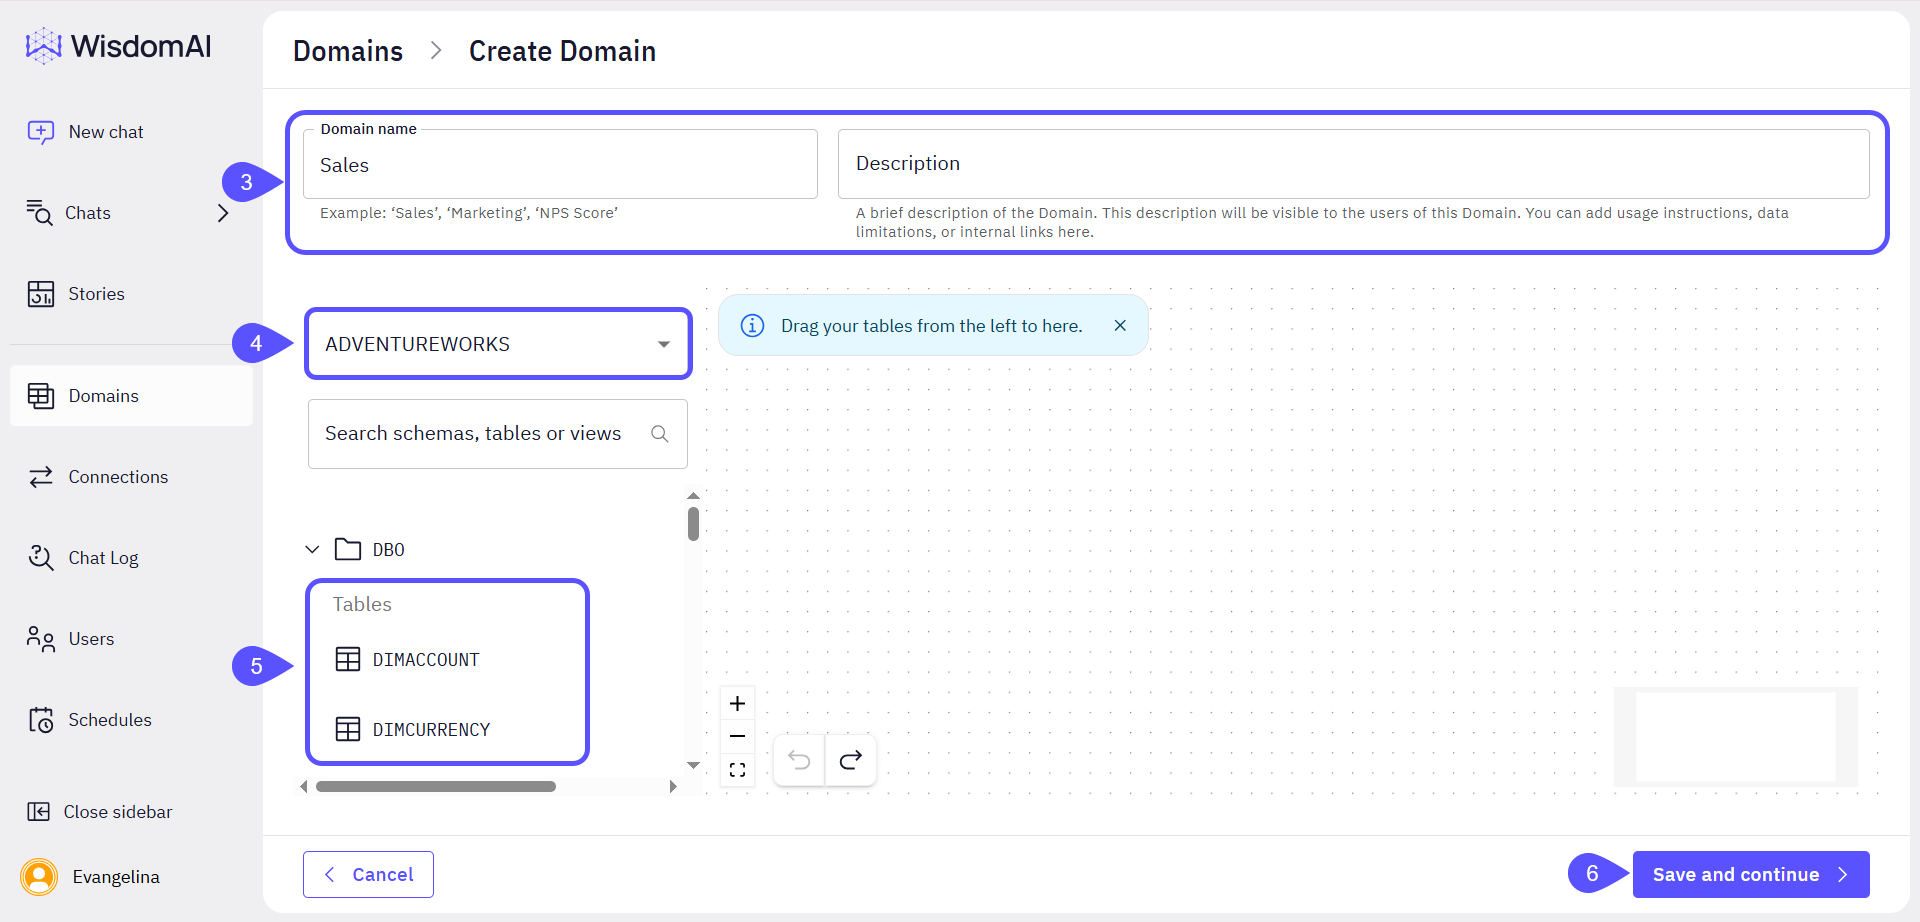
- Enter the Domain name and a Description for it.
- Select the database from the dropdown menu. Once selected, the list of tables will be displayed.
- Choose the tables you would like to use, then drag and drop them into the working area.
- Click on Save and continue. Now you are ready to start testing the WisdomAI chatbot to retrieve information and generate reports about your business.
Upload CSV Files
With WisdomAI, you can seamlessly integrate and analyze your existing data stored in CSV files. This standard and versatile format allows for quick integration within the platform, enabling you to gain rapid insights directly from your readily available data. To upload CSV files:- Navigate to the Homepage.
- Click on the Domain switcher.
- Select the Upload CSV file option.
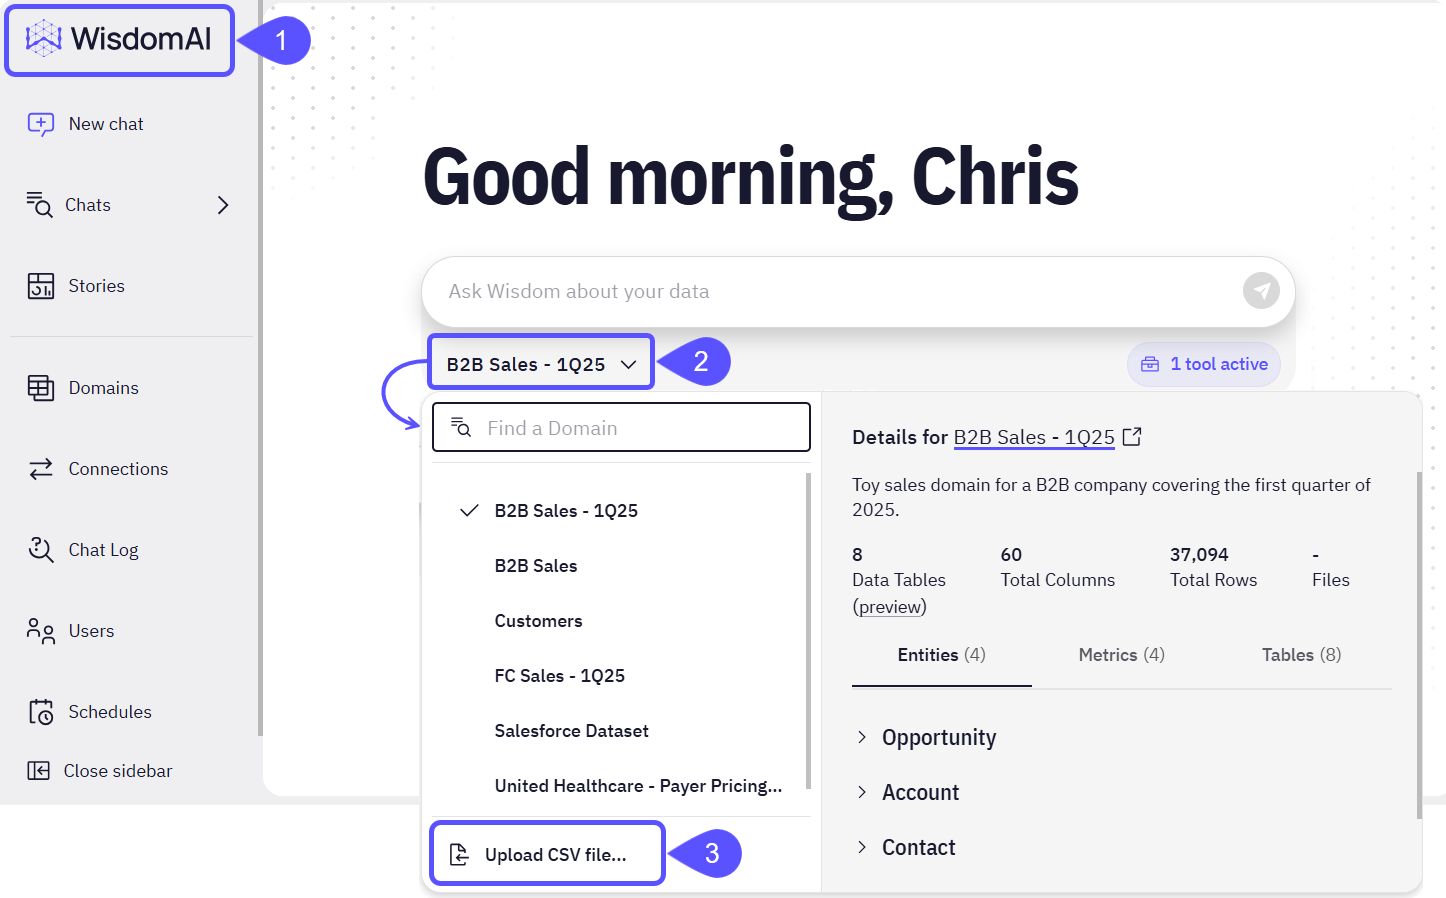
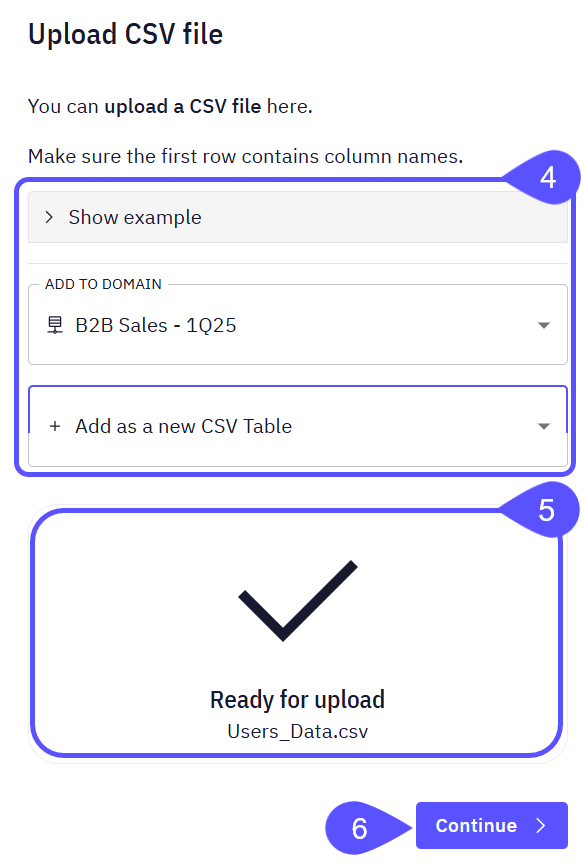
- In the modal that opens, you can:
- See an example.
- Add the CSV file to an existing Domain.
- Create a new Domain to add the CSV file.
- Drag and drop the file in the corresponding area.
- Click on Continue.
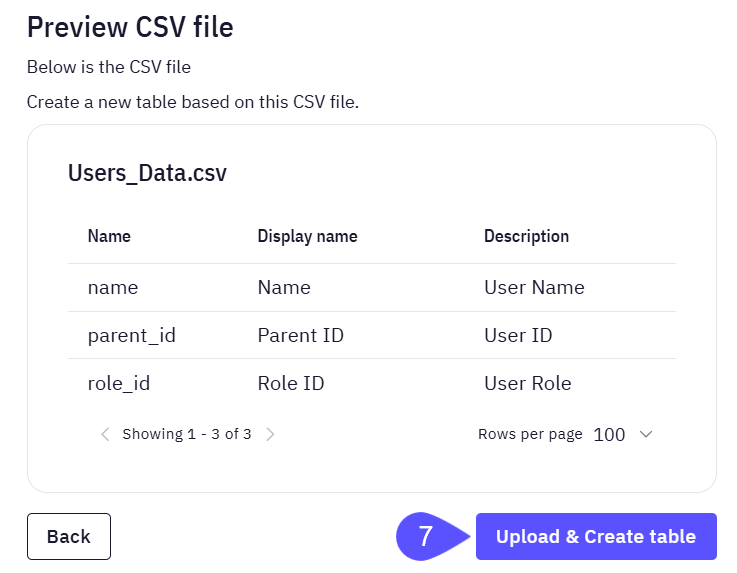
- In the next window, preview your file and click on Upload and create Table. It will automatically be fully integrated into the selected Domain.
Start Testing
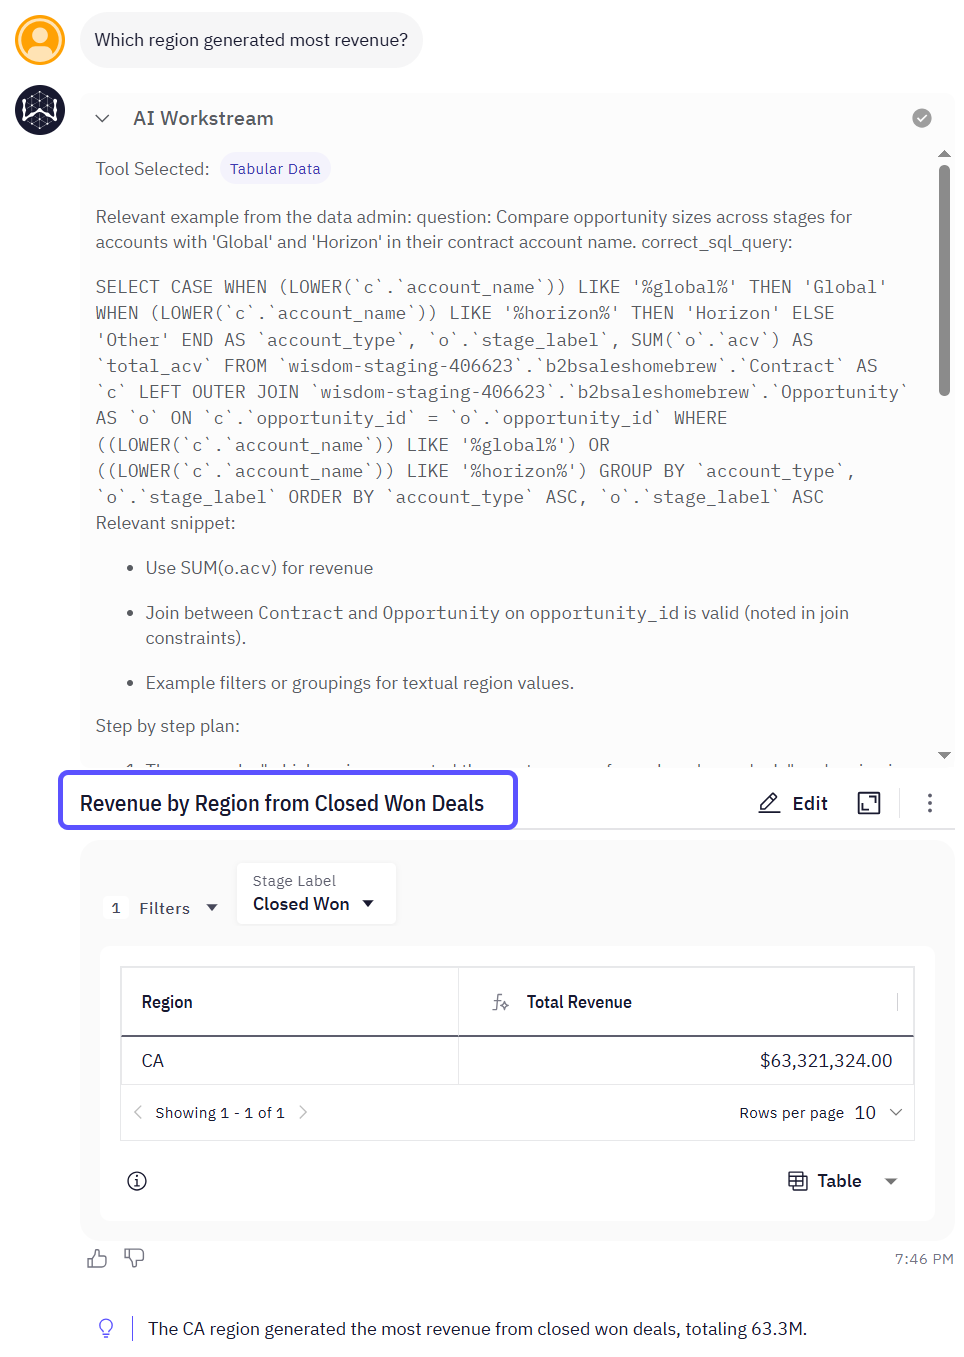
Once your data is set up and selected, you can begin experimenting with your WisdomAI chatbot to see it in action and test its data analysis capabilities. Here are some example questions you may ask:- “What was our revenue by region last quarter?”
- “Show me customer retention by month.”
- “Which products had the highest growth rate compared to last year?”
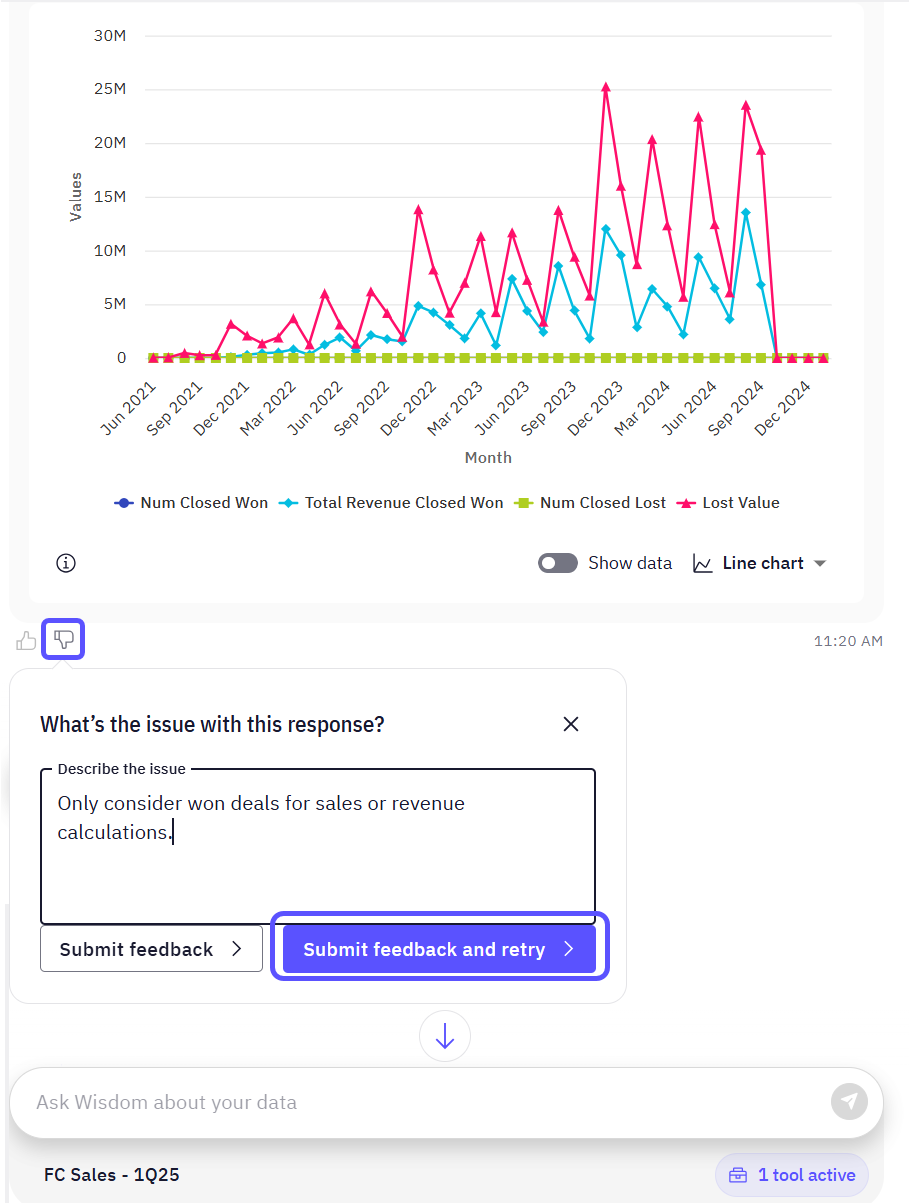
- Using the thumbs up/down icons. If your feedback was thumbs down, a new window opens to let you adjust the query accordingly. The more thumbs up/down you provide, the more you will be training the tool to get a high-quality, correct answer.
- By changing the SQL Code.
- By Fine-tuning the Context.
Think about the following scenario: you are telling the system that the Report it has created is not correct, so you provide the accurate data within the chat. If this additional context has not been added through the database tables, you will be able to add it directly through the chat.
Next Steps
Supported Data Sources
Explore the full list of databases and platforms you can connect to the system.
Advanced Data Modeling
Define relationships and context in your data to enable more powerful analysis.
Provide Feedback to the System
Learn how to rate answers and provide corrections to improve the system’s accuracy.