
Prerequisites
Before connecting WisdomAl to Snowflake, be sure to have:- An active Snowflake account and workspace.
- A Snowflake virtual warehouse with appropriate compute resources.
- A Snowflake user with the necessary permissions to create or assign roles and manage private keys.
- Network access configured to allow connections from WisdomAl to your Snowflake instance.
1. Information Required for Direct Connection Setup:
To connect WisdomAl to Snowflake directly, you will need the following information:-
Account: Your Snowflake account identifier. This consists of the name of the account prefixed by its organization (e.g., myorg-account123).
Refer to the Account identifiers page on the Snowflake documentation for details on finding your account identifier.
- Warehouse: The name of the virtual warehouse to use for compute (e.g., “COMPUTE_WH”).
- User: The Snowflake username that WisdomAl will use for access.
-
Private Key: The private key associated with the Snowflake user. Ensure the key is in PEM format, including the
----BEGIN...PRIVATE KEYand-END...PRIVATE KEYheaders and footers.Refer to the Key-pair authentication page on the Snowflake documentation for details on generating a private key. - Private Key Passphrase: This is required if your private key is encrypted.
- Role: The Snowflake role to use for access privileges (e.g., ACCOUNTADMIN). See the Using a Custom Role section below for details.
- [Optional] Database Filters: See the Database Filters section below for more details.
-
[Optional] Allowlist: You may need to allowlist WisdomAl’s CIDR block in your Snowflake network policies or firewalls to allow incoming connections. Use the CIDR block that corresponds to your instance’s creation date:
- Before July 24, 2025:
35.238.115.103/32 - On or after July 24, 2025:
34.82.248.105/32
- Before July 24, 2025:
2. Using a Custom Role:
To create a custom role and use it for WisdomAl communication, ensure the role has:- USAGE privilege on the warehouse and on the required databases/schemas.
- SELECT privilege on all tables that you want to connect with WisdomAl.
grant usage on warehouse <warehouse> to role <role>;- For each database:
grant usage on database <database> to role <role>;grant usage on all schemas in database <database> to role <role>;grant select on all tables in database <database> to role <role>;
- To grant access to all future schemas and tables added in this database:
grant usage on future schemas in database <database> to role <role>;grant select on future tables in database <database> to role <role>;
See this page of the Snowflake documentation for more details on granting privileges to your role.
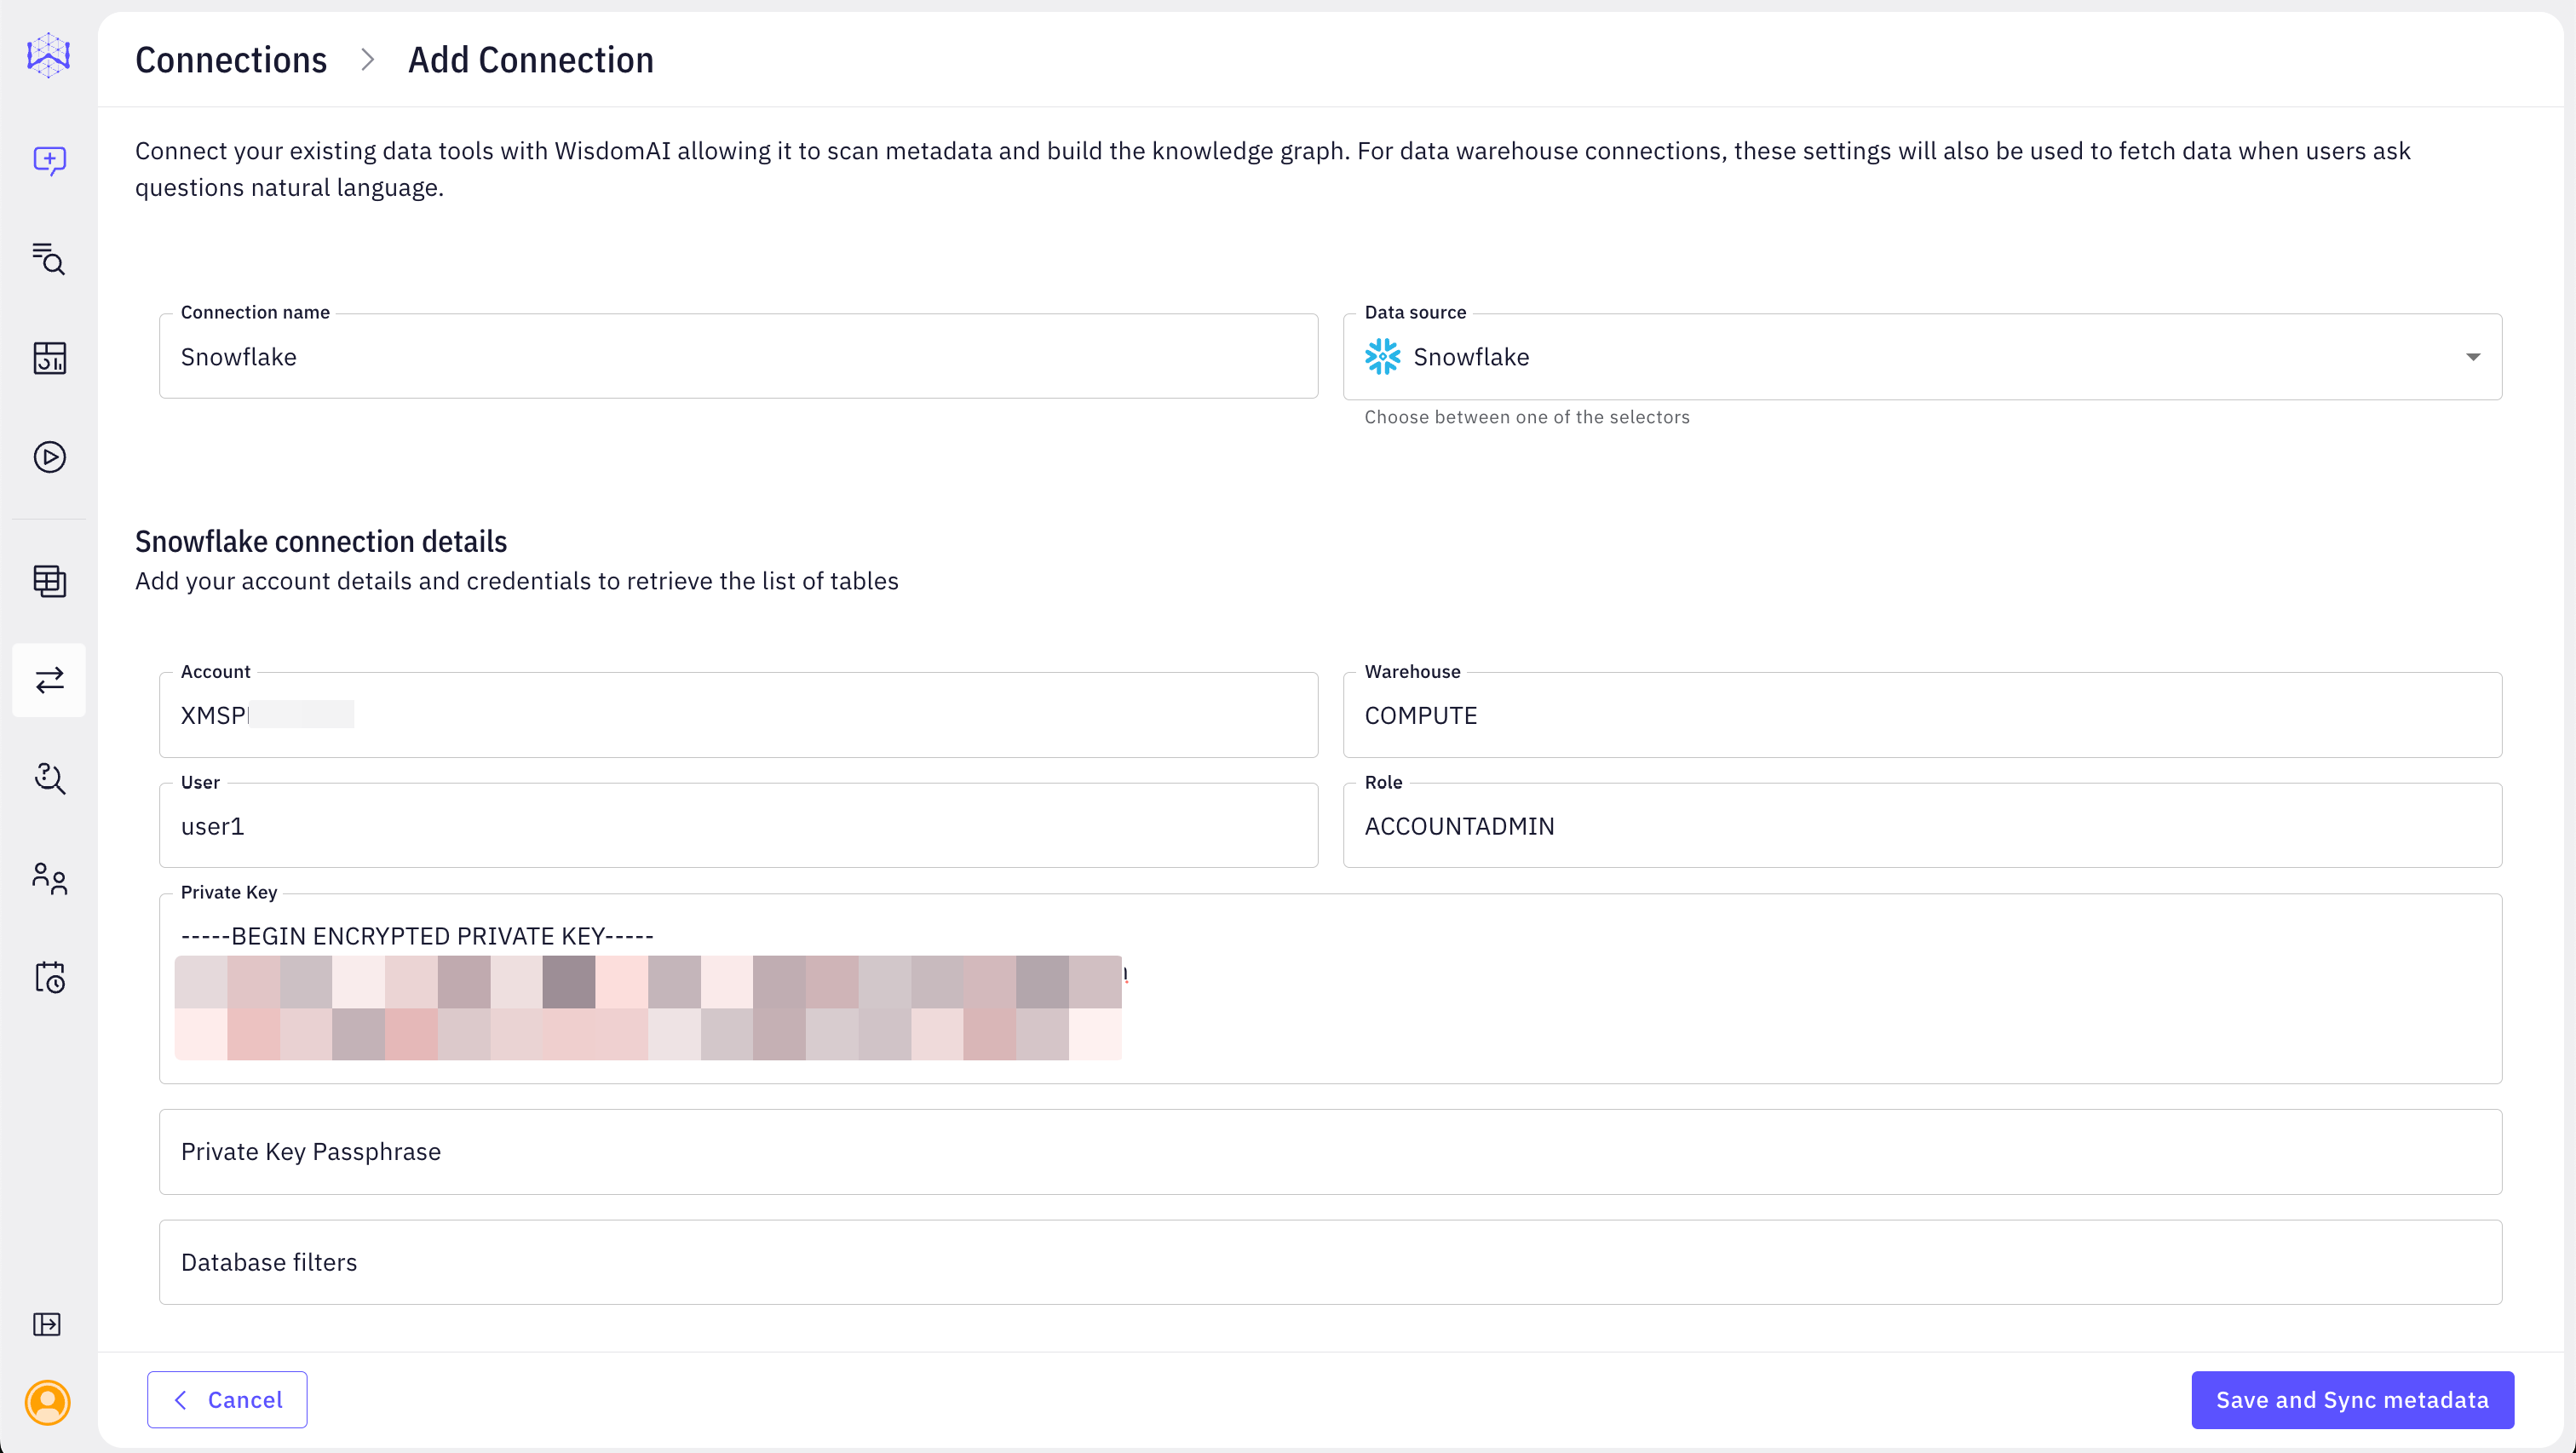
3. Connect WisdomAl to Snowflake:
Once you have gathered the required information, you can configure the connection in WisdomAl:- In WisdomAl, navigate to the Connections section and click Add Connection.
- Select Snowflake as the data source type.
- Fill in the connection details in the Snowflake connection details section:
- Connection Name: Choose a descriptive name for your connection (e.g., “Snowflake Prod”).
- Account: Enter your Snowflake account identifier (e.g., XMSPMYE-PAB51256).
- Warehouse: Enter the name of your virtual warehouse (e.g., COMPUTE WH).
- User: Enter the Snowflake username (e.g., user01).
- Private Key: Paste the content of your private key, including the
BEGIN ENCRYPTED PRIVATE KEYandEND PRIVATE KEYheaders and footers. - Private Key Passphrase: Enter the passphrase if your private key is encrypted.
- Role: Enter the Snowflake role (e.g., ACCOUNTADMIN).
- Database Filters (Optional): Specify any Database Filters if you want to restrict the databases WisdomAl crawls further.
- Click Save and Sync metadata. WisdomAl will use the provided credentials to connect to your Snowflake account and scan the metadata of the specified databases and tables.
Security Considerations and Best Practices
- Least Privilege: Always follow the principle of least privilege. Only grant the necessary permissions (USAGE, SELECT) to the Snowflake user that WisdomAl will use, and restrict it to specific warehouses, databases, and schemas.
- Secure Credential Management: Treat your private key file (rsa_key.p8) as extremely sensitive. Store it in a secure, encrypted location (e.g., a secrets manager or secure file system). Never hardcode private keys in application code or share them via insecure channels.
- Credential Rotation: Regularly rotate private keys used for WisdomAl’s Snowflake connection.
- Auditing: Enable and regularly review Snowflake audit logs to monitor access and activity performed by the WisdomAl connection.
Troubleshooting Common Issues
Having trouble? Here are solutions to some frequently encountered problems.Authentication Failed or Invalid Private Key
- Ensure the private key content is copied exactly, including the
BEGINandENDheaders and footers, without any extra spaces or line breaks. - If your private key is encrypted, verify that the Private Key Passphrase is entered correctly.
- Confirm that the Snowflake username matches the user associated with the private key.
Warehouse Not Found or Database Not Found
- Double-check the spelling of the warehouse and database names in the WisdomAl connection details.
- Ensure the Snowflake user/role has USAGE privilege on the specified warehouse and database.
Insufficient Privileges
- Verify that the Snowflake role assigned to WisdomAl has all the necessary USAGE and SELECT privileges as detailed in the Using a Custom Role section above.
- If you’re using database filters, ensure the role has privileges on the filtered databases.
Connection Timeout or Network Errors
- Verify that WisdomAl’s CIDR block (
35.238.115.103/32or34.82.248.105/32) is allowlisted in your Snowflake network policies or any corporate firewalls.